Windows Installation
This guide is to help you with the installation of Qualys, manually, on a Windows machine.
Open File Explorer (double left-click on the yellow folder icon from the taskbar usually)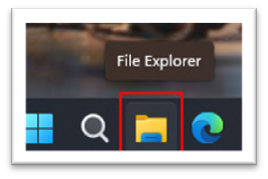
Scroll down and expand the ‘This PC’. Then left-click once on the ‘Local Disk’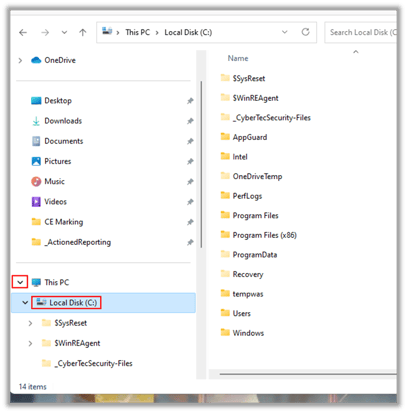
Right-click in the white space below the folders on the right.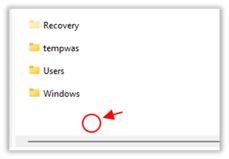
Use the mouse to select NEW and FOLDER from the menu that is shown.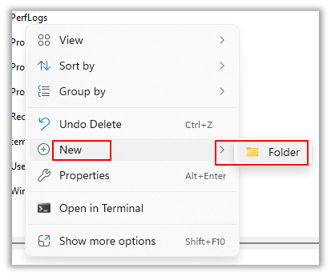
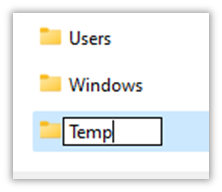
Then the new folder is created it is named ‘New Folder’. Type over this with the name ‘Temp’. Then press enter to complete.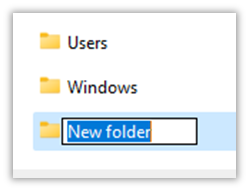
Download the agent from here: https://bit.ly/4erPmfU
DO NOT DOUBLE CLICK TO RUN THE APP
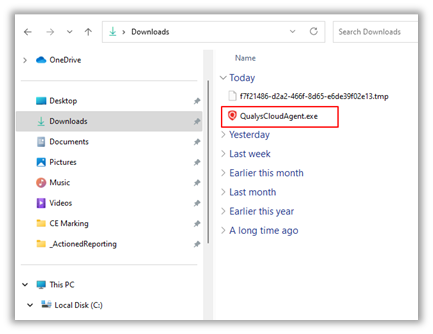
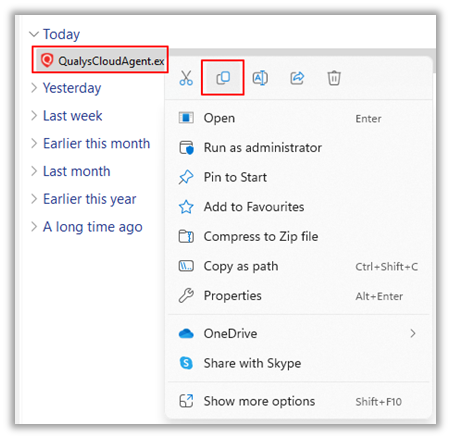
Open File Explorer and go to the Downloads folder. Right-click on the QualysCloudAgent.exe file.
Choose COPY (May be an icon at the top or the word COPY from the menu depending on Windows version)
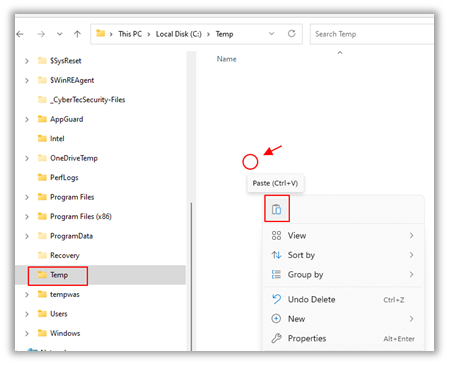
Locate the new TEMP folder that you created by scrolling down the left and looking under the ‘Local Drive C:’ again. Left-click on TEMP. Then right-click in the open space to the right and choose ‘Paste’ – using the icon or the word ‘Paste’ from the menu if shown.
Open the Windows Start Menu and type the word ‘Command’ in the search. Choose ‘Run As Administrator’ to open the command prompt.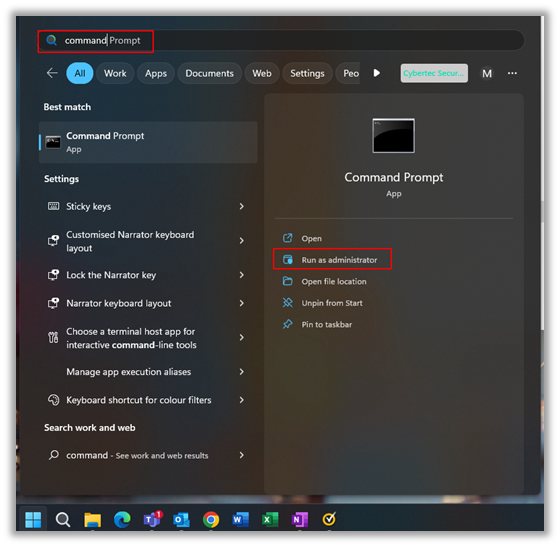
When the Command prompt opens, it will look like this. Check that it say ‘Administrator Command Prompt’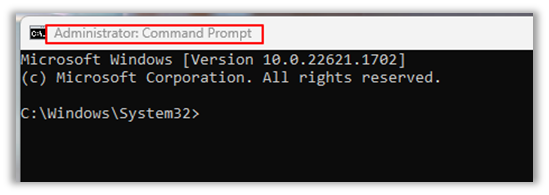
Type CD \Temp and press enter. The prompt will change to the folder name Temp.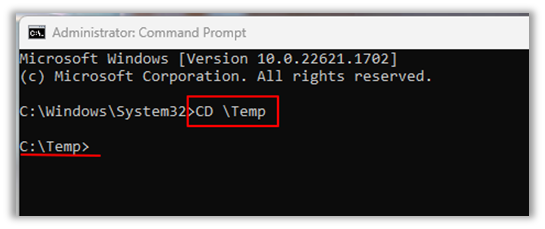
Copy the command line in full from the instructions you have been given. Right-click in the Command prompt to paste the command and then press enter.

Provided you get no errors, the installation has been completed.